
Dining room lighting sets the stage for everything that happens around the table, family dinners, holiday gatherings, or quiet weeknight meals. Yet many homeowners treat it as an afterthought, stringing up a single fixture and calling it done. The truth is, thoughtful dining room lighting transforms the space, flatters food and faces alike, and creates an atmosphere that either invites lingering conversation or signals “eat and leave.” This guide walks through the essentials of choosing and installing the right lighting for a dining space that works hard and looks good doing it.
Table of Contents
ToggleKey Takeaways
- Layered dining room lighting—combining ambient, task, and accent light—creates a balanced atmosphere that flatters both food and faces while adapting to different occasions and times of day.
- Hang your central chandelier or pendant 30–36 inches above the table surface, centered over the table, using the formula of room length plus width (in feet) converted to inches to determine ideal fixture diameter.
- Choose warm white LED bulbs at 2700K color temperature for dining room lighting, as they mimic candlelight and make skin tones and food look appetizing, while avoiding cool-spectrum bulbs above 4500K.
- Aim for 200–400 lumens per bulb in a central fixture or 300–500 lumens for pendants and chandeliers to achieve optimal brightness of 10–20 foot-candles on the table surface.
- Install dimmable fixtures on separate circuits so you can independently adjust ambient, task, and accent lighting layers to match the mood—from intimate dinner parties to bright family breakfasts.
- Space recessed lights 4–6 feet apart depending on ceiling height to prevent dark spots, and always test dimmers with your chosen LED bulbs before installation to avoid flickering or compatibility issues.
Why Lighting Matters in Your Dining Room
Good dining room lighting does three critical jobs at once. First, it needs to be bright enough to see what you’re eating without creating harsh shadows or glare on the table. Second, it has to flatter skin tone and food presentation, nobody’s appetite improves under cool, clinical light that makes everything look sickly. Third, it sets mood and controls how the room feels: warm and intimate for a dinner party, bright and energetic for a family breakfast.
Underlit dining rooms feel cave-like and unwelcoming. Overlighting washes out the space and makes gatherings feel sterile. Strike the balance wrong, and diners squint at their plates or feel exposed under interrogation-level brightness. The goal is creating flexible, layered lighting that adapts to different times of day and different occasions. That means moving beyond the single overhead fixture most homes start with.
Understanding Layered Lighting Basics
Layered lighting is the professional approach that separates mediocre dining spaces from ones that genuinely shine. The concept uses three types of light working together: ambient, task, and accent.
Ambient lighting is your base layer, the general illumination that fills the room. This typically comes from a central fixture (chandelier, pendant, or flush mount) or recessed lights spread across the ceiling. It should be dimmable so brightness adjusts throughout the day and for different occasions.
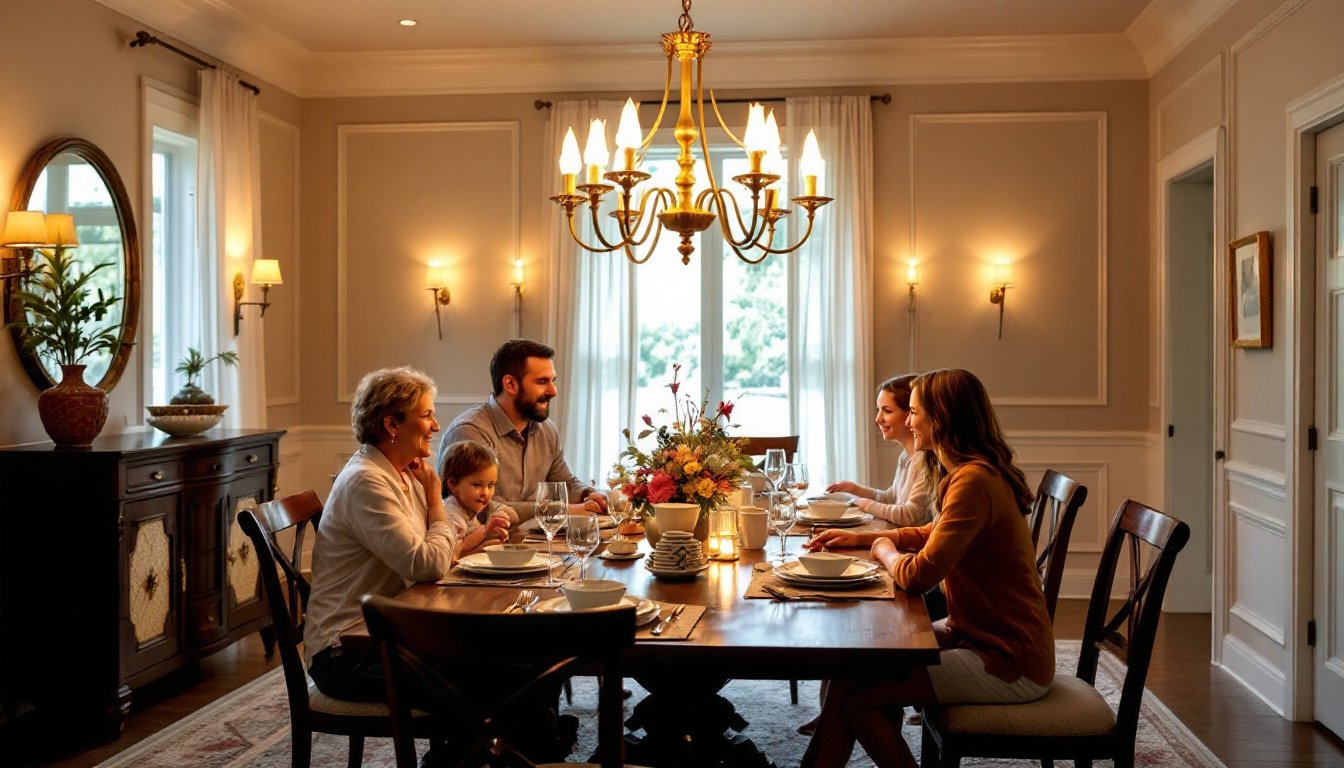
Task lighting targets the table itself, ensuring diners can see their food and place settings clearly. This is where your main dining fixture earns its keep. A well-positioned chandelier or pendant hung 30–36 inches above the table provides focused light without creating shadows across the table surface.
Accent lighting adds depth and visual interest: wall sconces flanking a buffet, uplighting on architectural features, or soft light from a sideboard. It’s the layer that prevents the room from feeling flat or one-dimensional. None of these layers should dominate alone: they work best in concert, with dimmer switches controlling the mix.
Choosing the Right Fixture Types for Dining Spaces
Chandeliers and Pendants
These are the workhorses of dining room lighting and for good reason: they hang over the table where they’re needed most. A chandelier with multiple arms and bulbs distributes light evenly across the table surface. Choose one proportional to your table and room, a small chandelier in a large dining room looks like an afterthought, while an oversized fixture in a small space dominates the conversation.
As a rule of thumb, add the dining room’s length and width (in feet), then convert that number to inches for ideal fixture diameter. A room that’s 12 feet by 14 feet suggests a fixture roughly 26 inches across. Hang it centered over the table, between 30–36 inches above the tabletop. This height keeps glare out of diners’ eyes while ensuring the table is well lit.
Pendants offer a more contemporary look and work especially well in modern or transitional spaces. They create a more linear light pattern, making them ideal for longer tables. Clusters of three or five pendants arranged in a line mimic how light distributes, though they’re trickier to size properly than a traditional chandelier.
For both chandeliers and pendants, bulb choice matters significantly. Warm white LED bulbs (2700K color temperature, discussed later) cast flattering light on skin and food. Avoid cheap LEDs that flicker or produce a greenish tint, the upfront cost difference is minimal, and quality bulbs run 25,000+ hours.
Track and Recessed Lighting
If your dining room has a vaulted ceiling or you’re averse to a statement piece hanging over the table, recessed fixtures and track lighting offer alternatives. Recessed lights (also called can lights or downlights) are installed flush with the ceiling. Spread across the room in a grid pattern, they provide even ambient light. The downside: they alone can feel harsh and impersonal without additional layers of softer light.
Track lighting mounts to a rail and lets you aim fixtures wherever needed. It’s flexible and works well in spaces where you want to highlight art, a sideboard, or architectural details while still lighting the table. The trade-off is that track lighting reads as more industrial and requires careful aiming to avoid shadows and glare.
Both work best paired with a supplementary fixture (like a chandelier) or wall sconces. If recessed lighting is your primary source, ensure fixtures are dimmable and spaced 4–6 feet apart (depending on ceiling height and bulb wattage) to avoid dark spots.
Setting the Right Brightness and Color Temperature
Brightness is measured in lumens (total light output) and illuminance or lux (light falling on a surface). For dining room task lighting over a table, aim for 200–400 lumens per bulb if using a central fixture, or 300–500 lumens for pendants and chandeliers. This translates to roughly 10–20 foot-candles on the table surface, bright enough to see clearly without feeling like a stage light.
Color temperature, measured in Kelvin (K), profoundly affects mood and appetite. Warm white (2700K) mimics candlelight and incandescent bulbs, making skin look healthy and food appetizing. It’s the gold standard for dining rooms. Neutral white (3000–4000K) feels slightly brighter and more businesslike: it works in casual breakfast nooks but can feel cool in formal dining spaces. Avoid anything above 4500K in a dining context, that’s daylight-spectrum territory and makes the space feel like an office.
Dimmable fixtures are essential. A chandelier set to 100% brightness at 6 p.m. on a weeknight creates different energy than the same fixture dimmed to 60% during a dinner party. That flexibility costs more upfront but transforms usability. Standard incandescent and halogen bulbs dimmed beautifully: quality dimmable LEDs do too, though cheap LEDs sometimes flicker or won’t dim below 30%. Spend the extra $5–10 per bulb for dimmable, quality LEDs rated for dimmer switches.
Practical Tips for Installing and Positioning Lights
Before buying fixtures, measure twice. A central fixture should hang centered over the table, mark the center point of your table, then locate the ceiling joist or use a stud finder to ensure safe mounting. Most chandeliers and pendants hang from a ceiling electrical box that sits over a joist. If your existing box isn’t positioned correctly, you may need to call an electrician to relocate it.
When hanging a fixture, follow the 30–36 inch rule above the table surface. Too low, and tall diners bump their heads or the light becomes glary: too high, and the table sits in shadow. If ceiling height is limited (under 8 feet total), a flush-mount fixture or low-profile pendant may work better than a traditional chandelier.
For recessed lighting, plan a grid before cutting holes. In an 8-foot-high ceiling, space fixtures 4 feet apart: in 10-foot ceilings, 5–6 feet apart. This prevents dark spots and reduces shadows. Always install a junction box at the fixture location (required by code) and run wiring before drywall. If you’re not confident running electrical, hire a licensed electrician, this isn’t the place to experiment.
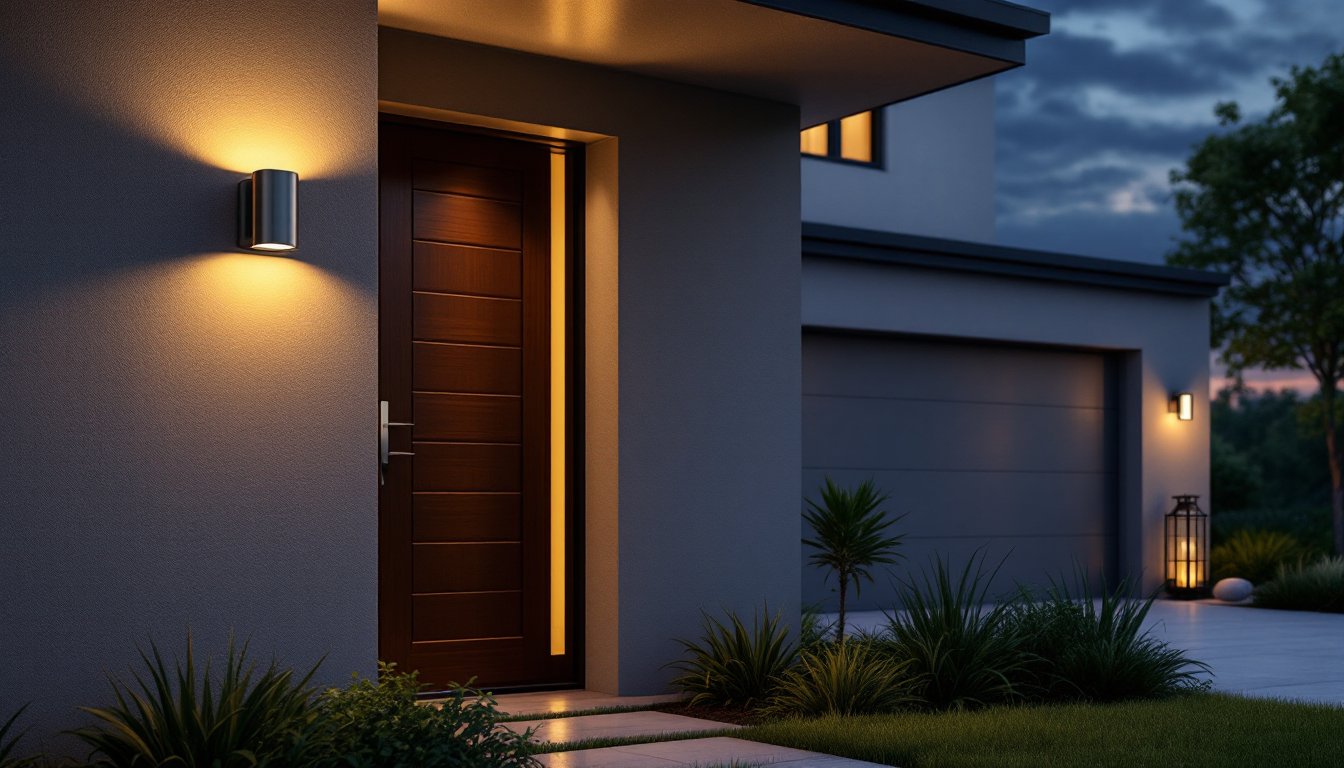
Wall sconces on either side of a buffet or mirror add balance and secondary lighting. Mount them 60–66 inches from the floor for even illumination without glare. Ensure sconces and your central fixture are on separate dimmer circuits so you can adjust each layer independently.
Final note: test dimmers with your chosen bulbs before installation. Not all LEDs play nicely with older dimmer switches, and a flicker or hum post-installation is annoying to fix.