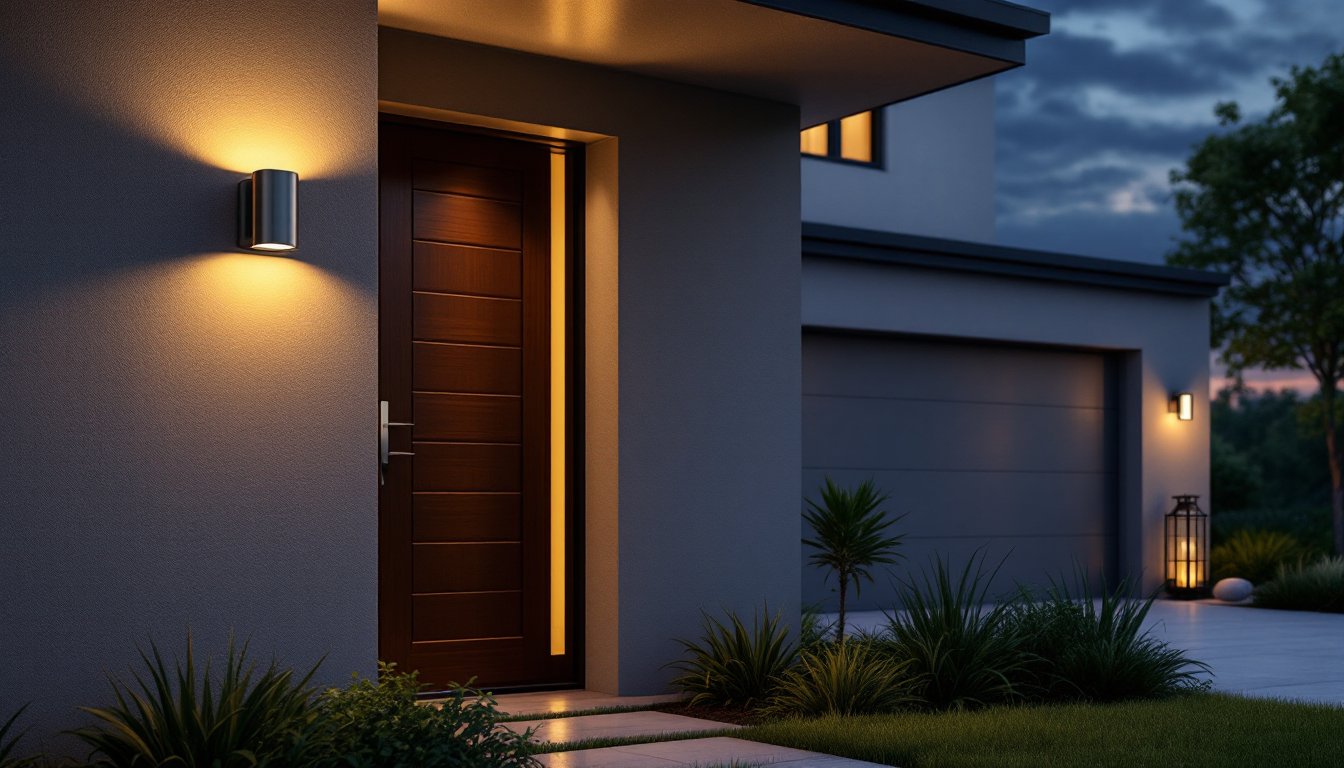

Recessed lighting, those sleek, flush-mount fixtures built into ceilings, transforms a room’s look while staying nearly invisible. Unlike surface-mounted fixtures, recessed lights blend seamlessly into any décor, making them ideal for modern kitchens, bathrooms, living rooms, and home offices. But choosing the right recessed lighting isn’t just about aesthetics. It’s about understanding fixture sizes, color temperatures, brightness levels, and installation constraints to get the job done right. This guide walks through the practical decisions that separate a lighting plan from a box of mismatched fixtures gathering dust in the garage.
Table of Contents
ToggleKey Takeaways
- Choose IC-rated recessed lighting fixtures for residential projects—they meet modern code, offer safety, and eliminate installation constraints like the 3-inch insulation clearance required for non-IC housing.
- Select 5-inch recessed lighting as the sweet spot for most rooms: it delivers bright output without overwhelming the ceiling, making it ideal for kitchens, bathrooms, and general living spaces.
- Match color temperature to your room’s purpose—use 2700K warm white for bedrooms and living rooms, 3000K for hallways and offices, and 4000K cool white for kitchens and task areas to avoid visual discord.
- Calculate brightness needs using the 60-watt LED equivalent rule: a typical room requires 50–100 lumens per square foot, so a 12×14 kitchen needs roughly 8,400–16,800 lumens spread across 6–10 fixtures.
- Verify your ceiling depth and electrical capacity before purchasing—recessed fixtures need 8–12 inches of attic clearance, and a standard 15-amp circuit handles 8–10 LED lights without overload.
- Test one fixture in place before committing to a full installation to confirm color, brightness, and dimmer compatibility, saving time and money on corrections.
Understand Recessed Lighting Basics
Recessed lighting consists of a housing unit that sits inside the ceiling cavity, a trim ring visible from below, and a light source, typically LED bulbs today, though older systems still use incandescent or halogen. The housing is where wires, junction boxes, and insulation meet: the trim is what people see.
There are three main housing types. New construction housing is designed for open ceiling cavities during framing, you nail it to the joists before drywall goes up. Remodel or retrofit housing has spring clips that grip drywall from above, letting you retrofit into finished ceilings without opening walls. IC-rated housing is insulation-contact rated, meaning it can touch insulation directly without fire risk: non-IC housing needs a 3-inch clearance, a major constraint in tight attics.
Choose IC-rated for most residential projects, it’s safer, meets modern code, and eliminates headaches during installation. Check your local building code before purchasing: most jurisdictions now require IC-rated fixtures in homes.
Determine the Right Size and Trim Style
Recessed fixture size is measured in inches across the trim opening: 4-inch, 5-inch, and 6-inch are standard residential sizes. Larger fixtures fit bigger bulbs and deliver more light, but they take up more ceiling real estate.
Selecting Appropriate Fixture Sizes
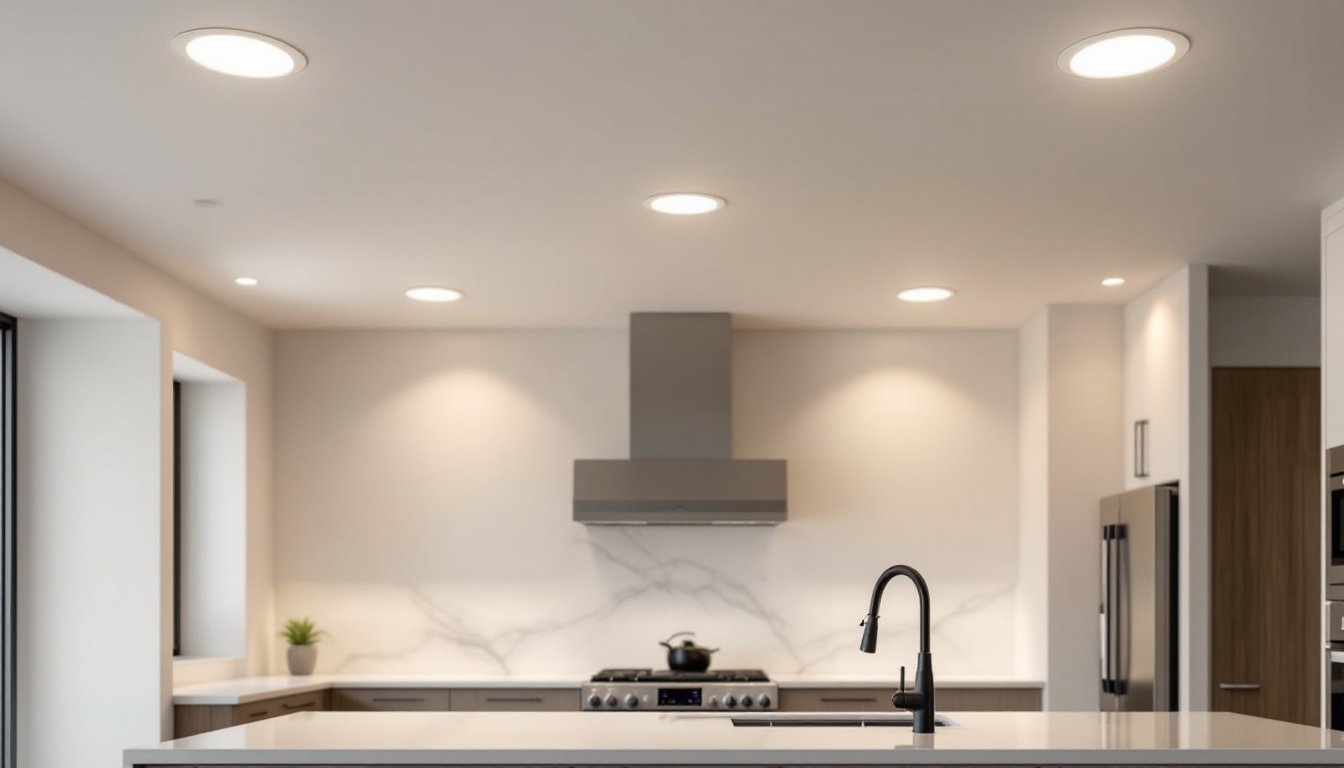
For kitchens and bathrooms, 4-inch fixtures work over task areas (sinks, counters) spaced 4–6 feet apart. A 5-inch fixture offers brighter output without dominating the ceiling and is often the sweet spot for general room lighting. Use 6-inch fixtures in larger kitchens, open-concept spaces, or when you need serious brightness. In bedrooms and living rooms, 4-inch or 5-inch fixtures provide ambient light without harshness.
Trim style matters too. Baffle trim has deep ridges that reduce glare and hide the bulb, excellent for kitchens where you’re looking up at the ceiling. Reflector trim bounces light downward more efficiently, maximizing output. Gimbal trim tilts 35°, letting you aim light at specific spots like artwork or architectural features. Shower trim is moisture-sealed for bathrooms: standard trim corrodes if exposed to humidity.
Measure your ceiling height and room dimensions before ordering. A low 8-foot ceiling feels cramped with multiple 6-inch fixtures: 4-inch and 5-inch sizes work better in tight spaces.
Choose the Correct Color Temperature and Brightness
Color temperature, measured in Kelvin (K), determines whether light feels warm or cool. Brightness is measured in lumens, higher lumens mean more light output.
Color Temperature for Different Spaces
2700K (warm white) feels like traditional incandescent, cozy, inviting, best for bedrooms, living rooms, and dining areas. 3000K (soft white) is neutral-warm, a safe middle ground for hallways and home offices. 4000K (cool white) supports focus and clarity, ideal for kitchens, bathrooms, and work areas. 5000K+ (daylight) mimics outdoor light and is rarely used indoors unless you need clinical brightness for detail work.
For lumen output, use the 60-watt equivalent rule: a 9-watt LED delivers roughly the light of a 60-watt incandescent bulb and produces about 800 lumens. A typical recessed fixture needs 50–100 lumens per square foot of ceiling area. In a 12×14 kitchen, that’s roughly 8,400–16,800 lumens total spread across 6–10 fixtures, depending on accent vs. task lighting.
Mix color temperatures strategically. Install 2700K in living areas and 4000K over counters and workspaces. Avoid mixing vastly different temperatures in the same room, it creates visual discord. Modern LED fixtures are dimmable (check packaging for compatibility with your dimmer switch), letting you adjust brightness and even shift color temperature if you go with tunable-white bulbs.
Consider Installation Requirements and Compatibility
Before buying fixtures, confirm your ceiling type and electrical capacity. Drywall ceilings accept both new-construction and remodel housings. Popcorn or drop ceilings are trickier, remodel housings with spring clips work, but popcorn ceilings require careful removal due to potential asbestos (hire a professional if your home was built before 1980). Plaster ceilings are labor-intensive to cut and patch: a pro may be worth the cost.
Check attic access and depth. Recessed fixtures need roughly 8–12 inches of clearance above the drywall for the housing. If your attic is shallow, low-profile or slim-line housings exist but cost more and limit bulb size. Joist spacing matters too, fixtures must either mount to a joist or span between joists. Standard 16-inch on-center framing accommodates most fixtures, but 24-inch spacing may require additional bracing.
Electrical requirements depend on fixture count and existing circuits. A typical 15-amp circuit handles 8–10 LED recessed lights (LED draws far less current than incandescent). If you’re adding lights to an existing circuit, check breaker load capacity, do not overload. Dimming introduces another variable: Leading-edge dimmers (standard rheostats) don’t always play well with LED fixtures: trailing-edge dimmers are more compatible. Test one fixture before wiring a whole room.
If you’re unsure about cutting holes, running new circuits, or working in an unfamiliar attic, hire a licensed electrician. One miswired recessed fixture can trip a breaker or worse.
Conclusion
Choosing recessed lighting comes down to asking the right questions: What’s my ceiling type and depth? What room am I lighting? Do I want warm or cool light? How bright does it need to be? Answer those, and you’ll avoid impulse purchases and installation headaches. Start with IC-rated, dimmable fixtures in 5-inch trim, a 2700K–3000K color temperature for living spaces, and scale up brightness based on room size and task. When in doubt, buy one fixture, test it in place, and order the rest once you’re confident it’s right.