

Landscape tree lighting is one of the most impactful upgrades a homeowner can make to their outdoor space. Done well, it extends usable hours on the patio, adds security, and creates an inviting atmosphere that makes the yard feel like an extension of the home. The beauty of tree lighting is that it doesn’t require extensive construction or permits in most jurisdictions, just thoughtful fixture placement, the right bulbs, and basic electrical work. Whether the goal is dramatic accent lighting or subtle ambient glow, the techniques are straightforward enough for DIYers to handle independently. This guide walks through everything needed to plan and install landscape tree lighting that looks professional and performs reliably for years.
Table of Contents
ToggleKey Takeaways
- Landscape tree lighting is one of the highest-ROI outdoor upgrades, increasing property value and usable outdoor space while improving security without requiring permits or major construction in most cases.
- Uplighting, downlighting, silhouetting, and grazing are the four essential landscape tree lighting techniques, each creating different moods and emphasizing distinct tree features.
- Low-voltage 12-volt or 24-volt LED fixtures are the ideal choice for residential tree lighting, offering safety, ease of installation, energy efficiency, and long-term durability compared to line voltage systems.
- Proper fixture placement is critical: uplighting should be buried 3 to 6 feet from the trunk, while grazing requires placement just 12 to 24 inches away to maximize textural effects.
- A six-step installation process—planning, gathering materials, installing the transformer, routing cable, connecting fixtures, and securing components—allows most homeowners to complete landscape tree lighting projects independently.
Why Landscape Tree Lighting Matters
Landscape tree lighting serves multiple purposes beyond aesthetics. It increases usable outdoor space after sunset, making patios and seating areas more inviting and functional. Security improves when trees and pathways are well-lit, deterring trespassing and making navigation safer. The right lighting also enhances property value by showcasing landscape features and architecture in evening hours, potential buyers notice homes that are beautifully lit at night.
From a practical standpoint, uplighting a mature tree or highlighting a specimen shrub costs far less than installing new hardscaping or replanting the landscape itself. It’s one of the highest-ROI outdoor upgrades available. Most setups require only an outdoor-rated transformer, low-voltage LED fixtures, and basic burial of a cable run, no trenching permits or licensed electrician required in most cases. That said, if running fixtures off existing 120-volt circuits (rather than a dedicated low-voltage system), a licensed electrician should handle the work and a permit may be required.
Essential Tree Lighting Techniques
Effective landscape tree lighting relies on a handful of proven techniques. Each creates a different mood and emphasizes different aspects of the tree or shrub being lit. Understanding these methods lets a homeowner choose the approach that fits the space and desired atmosphere.
Uplighting and Downlighting
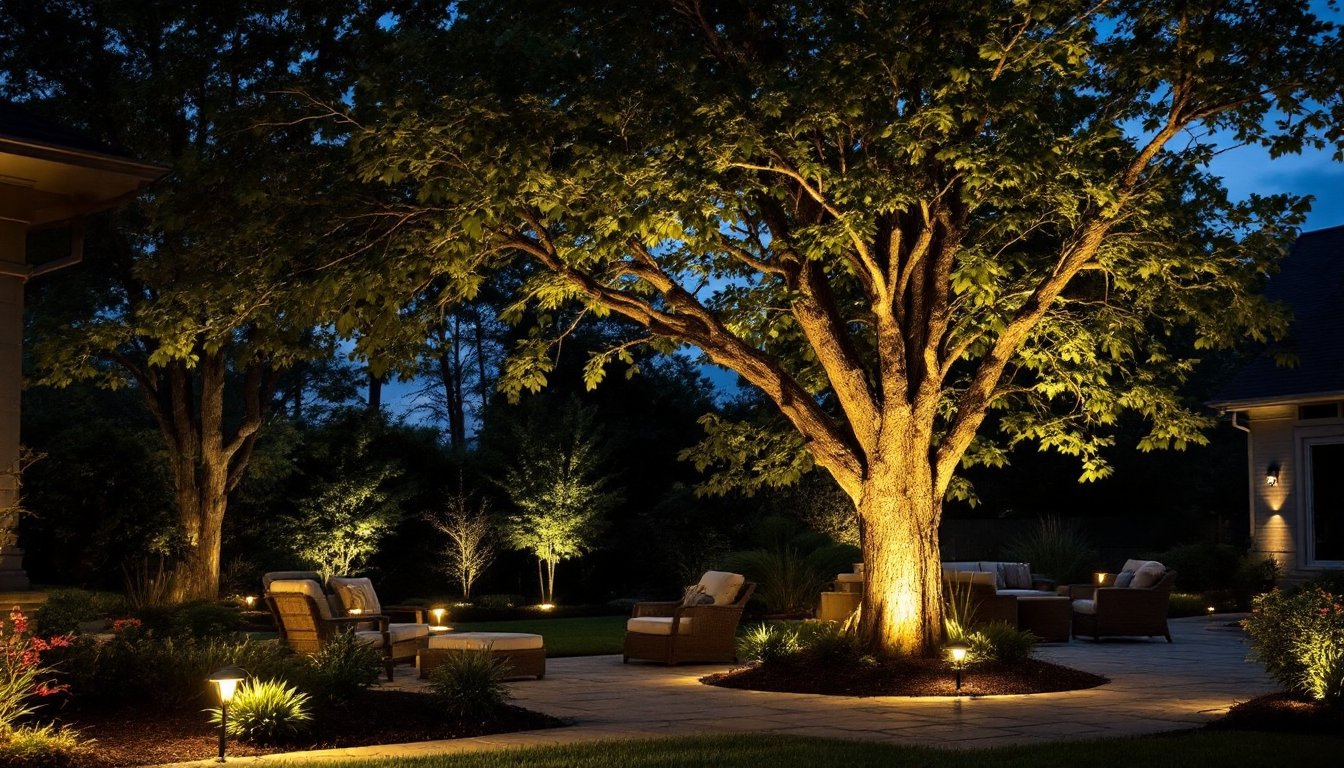
Uplighting means placing a fixture at ground level pointing upward into the canopy. This technique draws the eye upward and emphasizes the tree’s height and branching structure, making it particularly striking for tall deciduous trees with interesting limbs. Uplighting also casts a soft glow across the surrounding area, useful for ambient evening lighting on a patio. Fixture placement matters: bury the light 3 to 6 feet from the trunk, angled toward the interior of the canopy. Experiment with angle to avoid harsh shadows on structures behind the tree.
Downlighting, conversely, places fixtures higher up, mounted on nearby structures, branches, or on a post, aiming downward. This mimics moonlight and works well to graze the trunk and lower branches or to light a pathway beneath the canopy. Downlighting is gentler on the eye in a seating area because light falls from above rather than pointing toward viewers. A combination of uplighting and downlighting on the same tree creates depth and visual interest.
Silhouetting and Grazing
Silhouetting positions a backlit fixture behind a tree to create a dark outline against a brighter background, usually a wall, fence, or the side of the house. This technique highlights interesting branching patterns and works beautifully with ornamental trees or those with delicate foliage. Place the fixture several feet behind the tree, pointing back toward the wall. The tree appears as a dramatic shadow, particularly effective in evening photos.
Grazing uses a low-angled fixture placed very close to the tree’s trunk, pointing upward and slightly outward. The light skims across the bark surface, accentuating texture. Grazing works especially well on trees with textured, peeling, or mottled bark, think birch, sycamore, or crape myrtle. Keep the fixture close (12 to 24 inches from the trunk) and at a shallow angle to maximize the textural effect.
Choosing the Right Fixtures and Bulbs
Fixture and bulb selection drives both performance and long-term costs. LED is now the standard for landscape lighting, it’s energy-efficient, durable, and produces a range of color temperatures to suit any aesthetic.
For most residential tree lighting, 12-volt or 24-volt low-voltage fixtures are ideal. They’re safer than 120-volt line voltage systems, require no permit in most areas, and install simply with a transformer plugged into an outdoor-rated receptacle. Low-voltage systems use a transformer (usually 300 to 600 watts) to step down household voltage, then distribute power through buried or surface-mounted cables to each fixture. Fixtures range from simple spotlights (narrow, focused beam) to flooders (wider spread) to path lights and well lights. For tree uplighting, a 20 to 40-watt LED equivalent fixture usually suffices: for downlighting from a structure, a 15 to 30-watt fixture often works well.
Color temperature matters. Warm white (2700K to 3000K) mimics incandescent and suits residential settings, creating a cozy atmosphere. Cool white (4000K to 5000K) feels more commercial or clinical, useful for security lighting but less inviting for evening entertaining. For tree lighting focused on ambiance, warm white is the default.
Choose fixtures rated IP65 or higher to withstand rain, dirt, and seasonal changes. Stainless steel or powder-coated aluminum housings resist corrosion better than bare metal. Avoid cheap plastic fixtures: they degrade under UV exposure within a season or two. Mid-range fixtures from outdoor lighting specialists typically last 5 to 10 years with minimal maintenance.
Installation Best Practices
Proper installation ensures reliable performance and minimizes troubleshooting later. Most homeowners can handle a low-voltage system installation independently.
Step 1: Plan the Layout
Walk the yard at dusk with a flashlight, holding it at different angles and distances from target trees. This simulates where fixtures should go. Mark proposed locations with stakes or spray paint. Identify where the transformer will live, ideally on an exterior wall near an outlet, within 50 to 100 feet of the farthest fixture (longer runs require heavier-gauge cable).
Step 2: Gather Materials and Tools
You’ll need: the transformer, low-voltage fixtures, 12 or 24-volt landscape cable (typically 12 AWG or 10 AWG, thicker for longer runs), connectors, wire stakes, and a small shovel or trenching spade. If burying cable, a flat-spade shovel works better than a rounded one. Wear work gloves to protect hands when handling soil and fixtures.
Step 3: Install the Transformer
Mount the transformer on an exterior wall near a GFCI-protected outlet. Verify the outlet is rated for outdoor use. Plug in the transformer: most have an on/off switch and allow 1 to 8 fixtures per port (check manufacturer specs). Don’t overload a single port, it reduces brightness and can overheat the transformer.
Step 4: Route and Bury Cable
Lay out the cable run from the transformer to each fixture location. Cable can be buried 6 inches deep in soil, laid under mulch, or stapled to the base of structures using staples rated for outdoor use (avoid stapling through the cable itself: run it alongside). If burying, turn off the transformer before digging. Mark the cable route so you won’t accidentally strike it with a shovel next season. In freeze-thaw climates, bury at least 8 inches deep or use a cable protector sleeve in vulnerable areas.
Step 5: Connect and Test Fixtures
Most low-voltage systems use waterproof connectors that mate cable to fixture without cutting or splicing. Push connectors together firmly until they click or seat fully. Turn on the transformer and check that all fixtures light. Adjust angles and positions as needed, most fixtures swivel or tilt to fine-tune the beam direction.
Step 6: Secure and Finish
Use wire stakes or ground staples to hold fixtures in place. Bury the base of each fixture slightly below grade or hide it behind a plant to minimize visibility. Avoid harsh shadows by positioning fixtures so light doesn’t cast unwanted silhouettes on the house or fence. Cover any exposed cable with mulch, river rock, or a low-profile cable cover rated for foot traffic if the run crosses a walkway.
Conclusion
Landscape tree lighting transforms an outdoor space from functional to memorable, extending the usable hours and visual appeal of the yard after dark. With the right technique, fixtures, and careful installation, a homeowner can achieve professional-looking results without hiring a landscape lighting company. Start simple, pick one or two focal trees, install a modest system, and expand from there. The ability to adjust fixtures and refine the look over time is one of the joys of doing it yourself.