
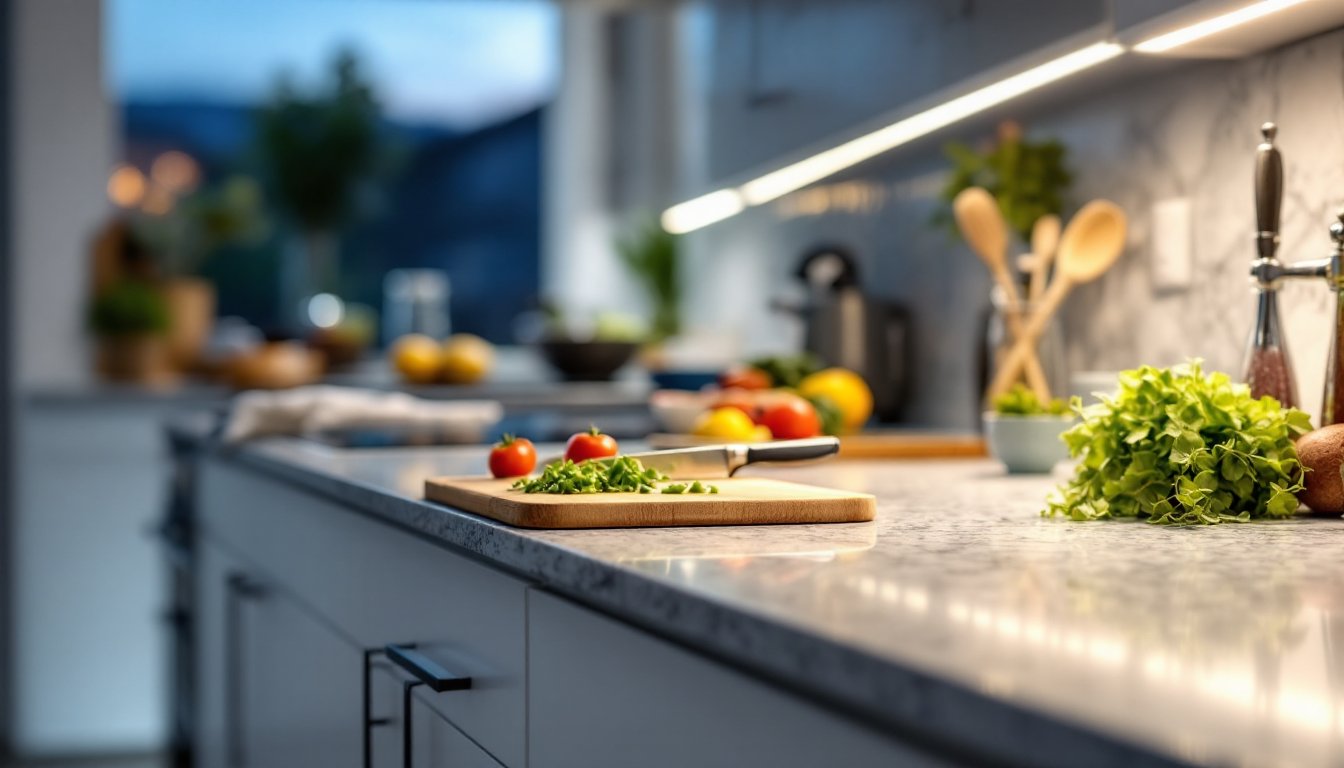
A dimly lit countertop is the enemy of efficient meal prep. Shadows cast by overhead cabinets make it difficult to chop vegetables, read recipes, or work with any precision. Under cabinet task lighting solves this problem by placing light exactly where it’s needed, right at countertop level. Whether someone is upgrading a tired kitchen or installing their first work lights, understanding the options and installation methods makes all the difference. Modern LED systems are affordable, energy-efficient, and far easier to install than they were even five years ago. This guide walks through everything from types of fixtures to installation basics to help readers choose and install the right solution for their space.
Table of Contents
ToggleKey Takeaways
- Under cabinet task lighting eliminates shadows on countertops, improving both meal prep efficiency and kitchen safety by positioning light exactly where you need it.
- LED strip lights are the most popular and affordable option for under cabinet task lighting, ranging from $20–$200 depending on features like dimming and color temperature control.
- Proper surface preparation—cleaning with rubbing alcohol and waiting 24 hours after installation—ensures adhesive-backed strips adhere securely and perform reliably.
- Color temperature matters for functionality: choose 4000K (cool, bright light) for task work in modern kitchens or 2700K–3000K (warm light) for traditional spaces.
- Under cabinet task lighting complements overhead fixtures by creating flexible, layered lighting that lets you use less energy while achieving better visibility during cooking and entertaining.
- Hardwired fixtures require local permit compliance and licensed installation, while adhesive strips offer a simpler alternative for renters or DIY installers hesitant about electrical work.
Why Under Cabinet Lighting Matters for Kitchen Functionality
Proper task lighting at countertop level isn’t luxury, it’s practical. When someone is working at the counter, overhead ceiling fixtures create shadows directly in the work zone. A paring knife disappears into shadow, prep becomes slower, and mistakes happen. Under cabinet task lighting eliminates that problem by placing light a few feet in front of the face, casting illumination downward and forward onto the work surface.
Beyond safety and efficiency, task lighting also improves the kitchen’s overall ambiance. A well-lit workspace feels larger and more inviting than one drowning in shadows. Many homeowners find that adding under cabinet lights transforms how they feel about their kitchen during evening cooking and entertaining.
Task lighting also complements general overhead lighting. Rather than relying solely on a single ceiling fixture, layering task, ambient, and accent lighting creates flexibility. On a busy weeknight, someone might use just the under cabinet lights and ignore the main fixture entirely, using less energy while achieving better visibility.
Types of Under Cabinet Task Lighting Systems
LED Strip Lights and Their Advantages
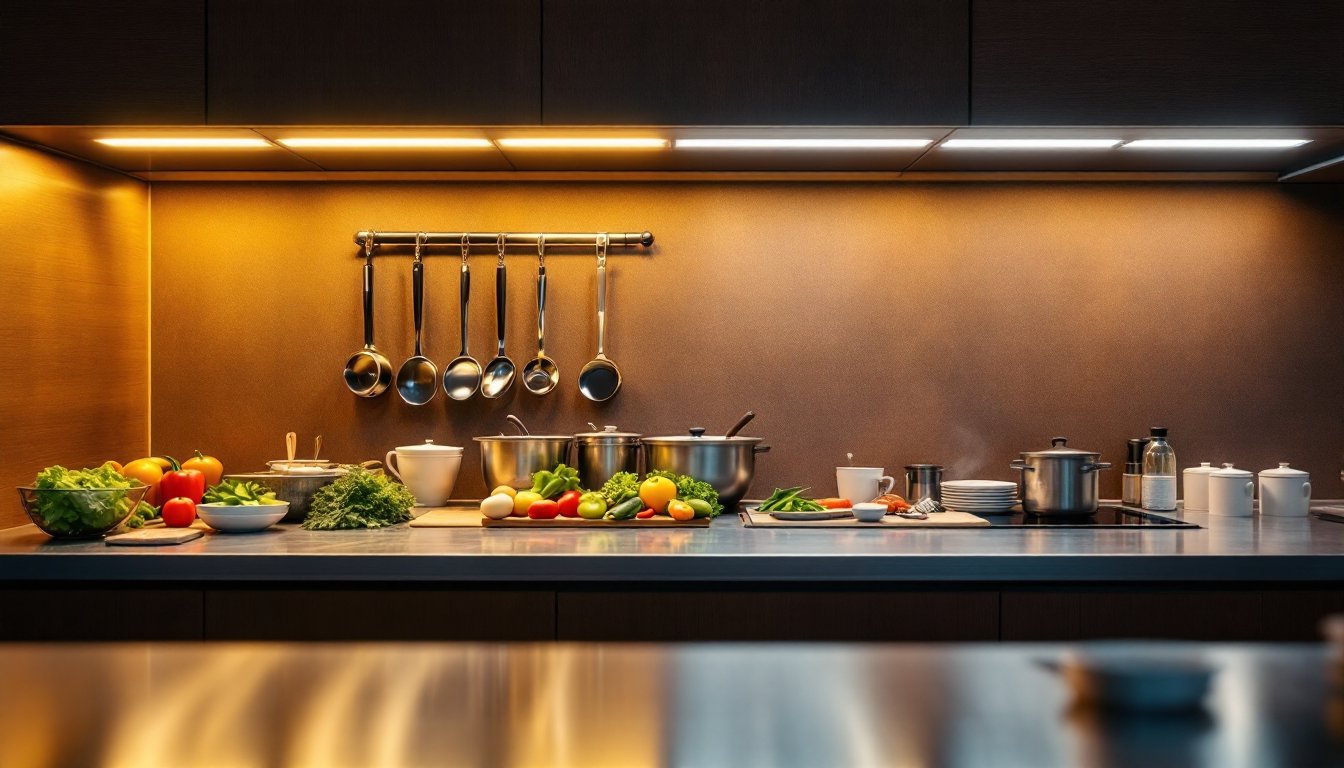
LED strip lights are the most popular choice for under cabinet installation in recent years. These flexible, low-profile strips come in adhesive-backed versions or in aluminum channels for a more polished look. They run cool, produce minimal heat, and draw very little power, critical when space behind or under cabinets is tight.
LED strips offer flexibility in length and color options. A homeowner can order 6 feet, 10 feet, or 16 feet depending on countertop width, and many systems allow linking multiple strips together. They come in white, RGB (color-changing), and tunable options. RGB strips are fun for accent lighting but typically overkill for task work: tunable white strips (adjustable between warm and cool tones) offer genuine practical value.
Installation is straightforward. Clean the cabinet surface, peel the adhesive backing, and press the strip into place. For a cleaner finish and better light control, mounting strips in an aluminum channel with a diffuser adds only minutes of work and creates a polished, professional appearance. Most quality strips include a transformer and dimmer switch: plug-in models are easier than hard-wired versions for renters or those hesitant about electrical work.
Price ranges widely: basic adhesive-back strips run $20–$60 for 16 feet, while quality tunable or RGB systems with aluminum channels and remote controls run $80–$200. The difference often comes down to dimming capability and color temperature range.
Puck Lights and Linear Fixtures
Puck lights (also called disc lights or spotlights) are small, round fixtures mounted individually under cabinets. They’re excellent for targeted brightness and come in hardwired or plug-in versions. Because they’re discrete and compact, puck lights work well in kitchens with limited space under cabinets or for supplementing strip lighting.
Linear fixtures bridge the gap between strips and puck lights. These are longer, often 12 to 24 inches, and mount flat under cabinet overhangs. They provide consistent, shadow-free illumination across a defined section. Linear fixtures often feel more architectural than strips and integrate well into minimalist or modern kitchen designs.
Both puck and linear options range from $15–$50 per unit, though high-end brushed nickel or integrated dimming versions can exceed that. They typically require hardwiring or a dedicated plug circuit, which adds installation complexity compared to adhesive strips.
Installation Tips and Best Practices
Preparation is everything. Clean the under-cabinet surface thoroughly with rubbing alcohol and let it dry completely. Dust, grease, or moisture prevents adhesive-back strips from adhering securely. For hardwired fixtures, confirm there’s accessible power nearby and check local electrical codes, running new circuits or installing fixtures near water requires permits and licensed electricians in most jurisdictions.
Measure twice, cut once. Determine the exact length of countertop requiring light. Many installers position strips 2–3 inches back from the cabinet edge so light spreads across the counter without directly hitting eyes. Take a moment to visualize the layout: using painter’s tape to mock up the strip position prevents mistakes.
For adhesive strips: Press firmly along the entire length to ensure good contact. Apply heat from a heat gun or hair dryer for 10–15 seconds after installation to activate the adhesive fully. Wait 24 hours before powering on.
For hardwired fixtures: Shut off power at the breaker before any electrical work. If installing multiple fixtures, run a single circuit and use in-line connectors to link them. Install junction boxes behind each fixture if code requires. Use 14-gauge or 12-gauge copper wire depending on circuit load and local code. If uncertain about wiring, hire a licensed electrician, mistakes create fire hazards.
Under-cabinet spaces are tight. Ensure transformer boxes fit within the cabinet footprint and won’t block door swings. Test dimmer switches before finalizing mounting. Wear safety glasses when working above head height, and wear work gloves when handling sharp cabinet edges or electrical connections.
Think about access. Position cords and plugs where they won’t snag during cleaning or cause tripping hazards. Velcro cable ties keep cords tidy and removable.
Choosing the Right Color Temperature and Brightness
Color temperature matters more than many first-time installers expect. Measured in Kelvin (K), warmer light (2700K–3000K) feels cozy and suits traditional kitchens, while cooler light (4000K–5000K) feels bright and energetic, ideal for task work and modern spaces. For task lighting specifically, 4000K is often the sweet spot, bright enough to see detail without feeling harsh.
Brightness is measured in lumens. A common mistake is overestimating how many lumens are needed. For a standard countertop, 500–1000 lumens across a 10-foot span is sufficient: many adhesive strips deliver 100–150 lumens per foot, so a 6-foot strip typically produces 600–900 lumens. Puck lights vary widely, from 200–500 lumens each, so spacing matters. Test brightness by positioning the fixture and observing actual shadows, the goal is even light without glare.
Many newer LED strips include dimmers, which add flexibility. A switch that allows 30%–100% brightness lets someone dial in the exact light level for different tasks and times of day. Tunable options, which shift between warm and cool tones, cost more but offer genuine utility for cooks who want energizing light during prep and warmer ambiance during evening entertaining.
When shopping, ignore marketing claims and check lumen ratings and Kelvin ratings on the spec sheet. A 5000K, 800-lumen system tells you far more than “ultra-bright” or “daylight-like” advertising copy.
Conclusion
Under cabinet task lighting transforms kitchen functionality without requiring structural changes or extensive rewiring. LED strips are affordable, efficient, and suitable for renters and homeowners alike. The key is choosing a fixture that matches the kitchen’s aesthetic, positioning it thoughtfully, and preparing the mounting surface properly. With correct color temperature and brightness levels, under cabinet lighting pays dividends every single time someone steps up to the counter to cook, making the investment worthwhile and the workspace genuinely better.